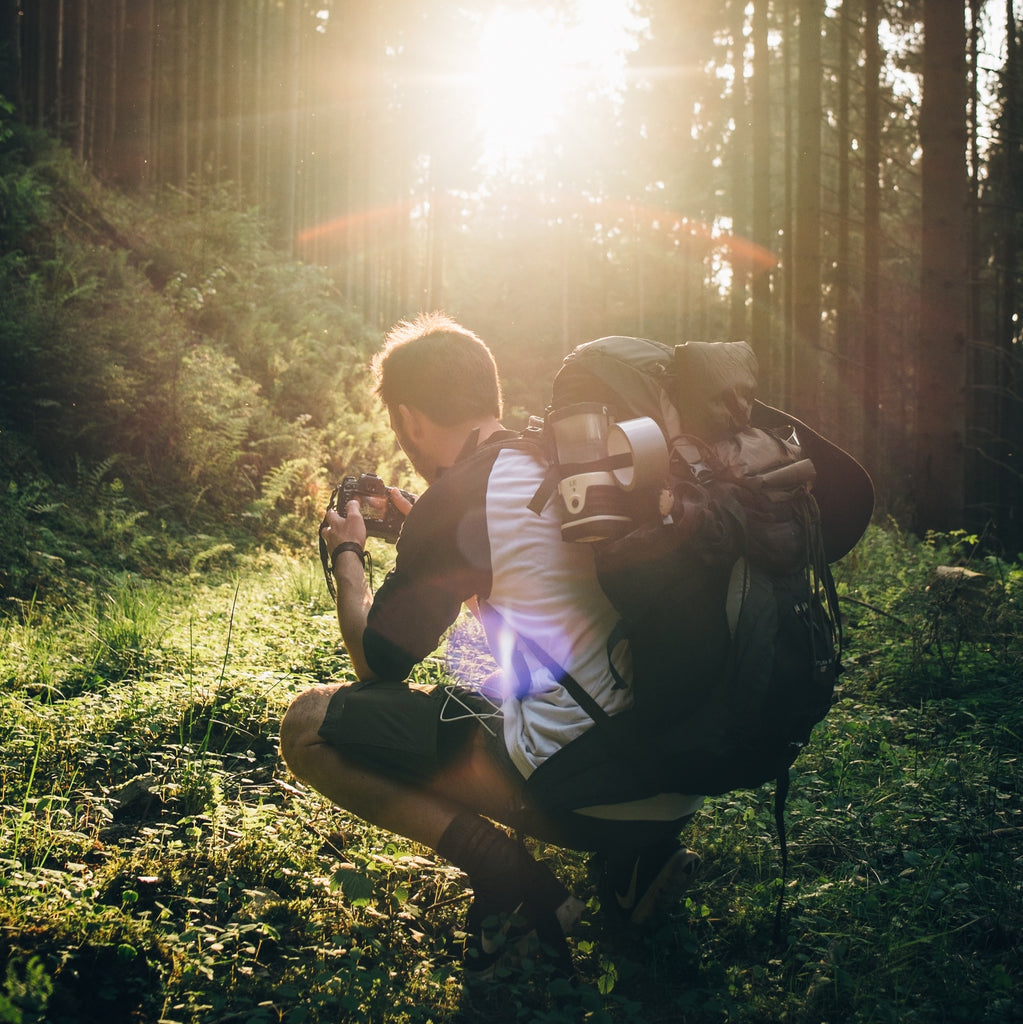
The Ultimate Backcountry Backpacking Checklist

By Sabrina Wu.
There’s nothing worse than arriving at your destination and realizing that you forgot something you absolutely cannot live without. Trust me, I’ve been there. Best case scenario, you can purchase it new (sometimes at a ridiculous price) or you figure out a way to make do without it. But sometimes things don’t quite work out and forgetting an item can jeopardize your safety, your travel plans, or even your health. The best way to avoid this predicament is by using this Ultimate Backpacking Checklist and the Wakeful Travel Ultimate Packing List for world travel adventures. This will ensure that you have all your ducks in a row, leaving you free and at ease to enjoy your local or far-from-home backpacking adventure.
This article is going to go through everything you need to know to make sure you’re prepared for both a backcountry backpacking trip, as well as an overseas backpacking trip.
We’ll go over:
- Backpacking Checklist for 3-4 Day Trips
- The Essentials: Backpacking Gear List for Beginners
- Backpacking Gear List for Intermediate and Advanced
- What to pack for Backpacking Food
- The Best Type of Water Filters and Purifiers for Backpackers
- Backpacking Clothing List for Hiking Trips
- Additional Backpacking Gear List & Toiletries
- Tips for packing Ultralight on a Backcountry Trip
- Backpacking Checklist for Travellers
Backpacking Checklist for 3-4 Day Trips
There’s no better way to experience the beauty of mother nature than going on a rugged backcountry adventure. Packing for this type of trip can be a bit tricky because you’ll have to carry everything you need to survive on your back at all times. There will definitely be a line between things that you need and things that are not quite worth it to carry. Deciding what to bring is a very personal process. The things that I find necessary in my list might not be so important for you, and vice versa.
However, there are a few essential items that you will absolutely need. The following packing list refers to a 3- or 4-day trip, which is the most popular amount of days people usually go on a backcountry trip. Depending on how many days you’re going for, you may need to adjust the number of items you pack accordingly.

The Essentials: Backpacking Gear List: Beginners
- Sleeping pad: There are a couple different options here. The cheapest option is a foam mat that you can roll up and attach to the outside of your bag. Although these mats are light, they do take up a lot of space and they are cumbersome to attach onto your bag. The other options are either an inflatable sleeping pad or a self-inflatable sleeping pad. Both of these options will be smaller than the foam mat, but more expensive. Inflatable sleeping pads are typically more packable than self-inflatable ones, but I find that the self-inflatable pads are more comfortable. Another thing you will consider other than size, weight, comfort, and price is the R value rating. The R value rating is the insulation rating. If you are planning to go in the colder months of the year (negative degree weather), you will definitely need something with a R value of 4+.
- Tent: Tents come in different sizes based on the number of people that are going to be sleeping inside. Since backcountry tents prioritize size and weight, the amount of space that a tent allocates per person is quite small. A general rule is that each person will get one sleeping pad of space. This doesn’t leave a lot of room for your gear. So, if you are a larger person, you may want to go one size up or find a tent with a vestibule, which is an outside compartment of the tent where you can store your backpack. Tents are best packed separately. If you are going with other people, separate the mesh part of the tent, the fly, tent poles, and stakes and distribute these items amongst your group. This will help alleviate the weight and space that a tent takes up. If you are going solo and don’t have a lightweight tent, it may be worth considering purchasing a bivy or using a tarp to create a single shelter instead.
- Sleeping bag: Just like sleeping pads, sleeping bags also come in all different shapes and sizes. Typically, you will be looking at either a synthetic or a down sleeping bag. A synthetic sleeping bag won’t pack as small as a down bag but the benefit is that synthetic insulation can get wet and retain its insulating qualities. On the flip side, once a down bag gets wet, you lose all the insulating qualities. This can be detrimental during the times of year when the weather is fluctuating around zero because waterways are not frozen and precipitation will likely be rain (not snow or hail), increasing your chances of getting your sleeping bag wet. And because the temperature is close to zero, it will be cold, and sleeping in a wet sleeping bag in those conditions is extremely dangerous. Basically, when purchasing a sleeping bag, you will be considering things like temperature, comfort, material, size, and price.
- First aid kit: Your first aid kit should include band-aids, ibuprofen or acetaminophen, antihistamine allergy medication, alcohol wipes, medical tape, anti-diarrhea pills, tweezers, safety pins, and tape for blisters. You can either bring moleskins for blisters or I personally bring electrical tape. Electrical/duct tape is more versatile, has multiple uses, and works perfectly fine over developing blisters.
- Headlamp: Headlamps are going to be a lifesaver if you ever find yourself hiking into the night. They’re also useful for when you are using the bathroom at night or even just doing things around the campsite. Headlamp ratings are based on lumens - the larger the number, the brighter the bulb. Some headlamps will also have different features like a dimmer setting or a red light. Red lights are good to have when camping with other people because the light is not as harsh when accidentally pointed at your friend’s face. Make sure to pack a few extra batteries as well.
- Backpacking stove: MSR and GSI offer really good lightweight options for stoves. Jet Boil is another option however Jet Boil is only limited to boiling water. If you choose either the GSI or MSR stoves, you will also need to purchase a lightweight pot to boil water or cook food on. Another option is to just bring a grill and use that over a fire to cook food. However, I would not recommend this as your only option, in case there is a fire ban or if the weather conditions are too wet to start a fire.
- Lighter/matches: Speaking of fire, most people don’t actually know how to start fires from scratch. Luckily, lighters or matches do the trick. Firestarter is nice to bring as well. In popular campsites, there often is a lack of dead brush on the forest floor because many people collect this brush to start campfires. This is not great for the environment because instead of the brush decomposing and cycling back into the earth, it is being burned. Bringing a fire starter will ensure that you have kindling to get your fire going, and the earth will thank you for it. And even better yet? You can make your own fire starters at home.
- Utensils: Sporks. ‘Nuff said.
- Stuff sack or canister: Whether you are camping in bear country or not, you still need to be mindful about packing your food away. Mice, squirrels, raccoons, and opossums can and will get into your food. Not only does this suck because they’re eating your food, but this also teaches animals that humans have food. This desensitizes animals to humans, which may attract them to humans in the future and cause altercations. To store your food, use a bear canister, a smell-proof bag, or a stuff sack which you tie up to a tree. A bear canister is the most dummy-proof way to store your food. If you decide to use a smell-proof bag or a stuff sack, please do your due diligence and do your research beforehand.
- Paracord
- Knife/multi-tool
- Cloth bag: For dirty/wet clothes. Use this instead of Ziplock or plastic bags.
- Trekking poles: Trekking poles are certainly helpful but not essential. You will have to determine yourself whether this is a tool that will be necessary for your trip. Choosing a compactable option like the Black Diamond Trail Trekking Poles is a great option particularly for the backcountry.
- Water bottle: Each day you should carry approximately 1.5-2L of water. Note, depending on the temperature, distance, and your own personal needs, the amount of water you need may vary. There are a few different options for carrying water. You can carry a hydration pack which fits in a small pocket at the back of most backpacks. They typically come in 1 or 2L sizes which is very convenient because it can carry all the water you need for the day and is easy to access while hiking. You can also use a Nalgene-style water bottle which comes in 500mL, 1L or 1.5L sizes. Nalgene bottles are a good option because they can hold hot water and are easy to use for cooking, water collection, cleaning, etc. Finally, you may consider using a thermos. For very cold days, thermoses are essential because water will otherwise freeze in a Nalgene or hydration pack. Likewise, thermoses will keep water cold during hot days.
- Water filtration/purification system: Throughout your hike, you will need to refill your water at streams, lakes, or rivers. A general rule is to avoid getting your water from small, stagnant water sources. This water will be more prone to bacteria and viruses that can make you sick. Filtration and purification systems may not be reliable on highly contaminated water. Keep in mind, filtration and purification are not the same thing. Filtration means to filter out debris or substances within the water. It is only effective to a certain size of substance (each water filter will note this size on its package). It will not remove viruses or bacteria that are smaller than this denoted size. Purification is the method of actually killing the bacteria and viruses within the water. In relatively clean running water that is not obviously contaminated by run-off, pollution, and feces, you can get away with either one or the other. If you are unsure, your best bet would be to get something that does both. My favourite is by far the Grayl Water Purification Bottle and Filter
- Maps/navigation: You can use old-school maps or purchase the All Trails or Gaia navigation apps. These apps allow you to download a route to use offline. Using the location feature on your phone, these apps allow you to track where you are during your hike.
- Backpacking pack: Finally, if you are going backpacking, you will need a backpack. Backpacks come in all different sizes. For a 3-4-day trip, you will be looking at anything from a 40L pack to 85L. The size will depend on the time of year you are going (gear for cold weather takes up more space), your size (gear for larger people takes up more space), your gear (lightweight vs. regular), your experience level, and your personal preference. For beginners, in 15C+ weather, I would recommend a 55-60L pack. There are also usually user sizes (S, M, L) as well as men’s and women’s sizes. When trying on a backpack to purchase, make sure you adjust all the straps. The center of the hip belt should sit around your belly button. The belt itself should sit on your hip bones. Make sure your pack has a chest strap, a strap to adjust the length of the shoulder straps, and a strap that adjusts the distance of the pack to your back at the top. It should be comfortable. If the bag is not comfortable empty, it’s not going to be comfortable with 40 pounds in it. The best backpack brands that will have everything geared towards a backcountry trip are Osprey and Gregory. They also have amazing quality assurance and customer service.
All the gear mentioned above can be purchased from outdoor outfitter stores or online through MEC, REI, Patagonia, or Black Diamond. It’s always best to consult with a sales associate to help you find the best options.

Backpacking Gear List Intermediate and Advanced
As you become a more advanced backpacker, you may find that there are some items that you can go without. This makes room to bring things that will make your experience more comfortable. For example, I find that beginner backpackers tend to pack more clothes. For myself, I only pack one set of hiking clothes and one set of sleeping clothes. This gives me more room to pack camp shoes (comfy shoes/sandals to wear at the campsite), a book, and my DSLR camera. Other things that people may want to bring along on their backpacking trip to make it more comfortable are: a packable camp chair or stool, hammock, fishing rod, light weight towel, etc.
As you become more advanced, you may also choose to hike more advanced routes. For example, if you’re doing a John Muir style mountaineering expedition in Patagonia, in addition to a completely different set of gear and clothing that is rated for winter, you will also need to bring ice axes, gaiters, mountaineering boots, crampons, snowshoes, a shovel, avalanche gear, ropes, carabiners, etc. Some multi-day hikes require leaving the bulk of your things at base camp and then doing multiple day hikes throughout the trip. In this case, it would be useful for hikers to bring a daypack to carry food, water, and gear.
Everything, of course, will all depend on the route you are taking and what that specific trip entitles.
For beginner hikers, I would highly recommend sticking to the basics. As nice as it would be to bring a hammock, the more things you bring, the more things you carry. If you’re not used to lugging your life on your back over uneven terrain and harsh elements, it’s best to keep things as simple as possible. Your backpack might feel fine 20 minutes into your hike, but depending on how far you’re planning to go, it may not be sustainable.
What to Pack For Backpacking Food
This is one of my absolute favourite parts of planning a backcountry trip. You can be as creative as you like, and similar to the gear list, what you pack for food is completely personal to your tastes and preferences.
For those who would prefer to keep things simple, you can purchase dehydrated food bags for your meals. No prep, no thinking, no worries. Backpacker’s Pantry and Mountain House are popular brands that make decent breakfast, entrée, and dessert items. Personally, my favourites are Mountain House macaroni and cheese, and Backpacker’s Pantry Pad Thai. These meals are super simple to prepare. Just add water as instructed on the pack.
For those of you who want a little more from their food, here are some things to consider when packing:
- Spoilage: As you probably know, the warmer it is outside, the faster food will spoil. During cool weather (5-10C) you will have a bigger variety of things that you can bring without worrying about spoilage. During warm weather though, you want to stick with non-perishable foods or foods that can withstand heat (root vegetables, peppers, avocado)
- Amount of labour: If you don’t mind spending time preparing food while at the campsite then you definitely have more options in terms of bringing fresh produce. Foods like peppers, tomatoes, avocado, and potatoes can be brought if you are willing to chop them at your campsite. Chopping them beforehand can lead to faster spoilage. During cool weather though, you can definitely prepare them beforehand and store them in a reusable produce bag
- Dehydrating food: If you don’t want to chop things at the campsite, you may want to consider dehydrating food. From there you can boil them or toss them in the pan with some water to rehydrate them.
- Cleaning: Try to eat everything you cook. If you can’t, dispose of food waste in a compostable bag to carry it out (leave no trace). To clean your dishes, make sure to bring biodegradable soap and do not wash your pots in the water source. You should be 200ft (70 steps) from the water source. Use your water bottle to pour water onto your dishes to clean them.
- Weight: For a backcountry trip, be mindful about the amount of weight that you are carrying in food. The weight of cans and jars can definitely add up.
- Don’t forget about snacks! Aim for a good number of calories in the day. This number will vary from person to person. Consider that you will be hiking and carrying a lot of weight so that will increase the amount of energy expenditure. High caloric-density snacks (like nuts and energy bars) are an easy way to add extra calories.
- Lastly, make sure you are packing enough for each day. If you are expecting a day to be harder, make sure you allocate more food for that day. You will need it.
The Best types of Water Filters and Purifiers for Backpackers
Like I mentioned before, filters and purifiers work differently in that filters remove debris and purifiers kill debris. Depending on your preferences, where you are hiking to, and what is most convenient for you, both can be great viable options for obtaining clean drinking water.
Here is a list of tried and true water filters and purifiers:
- Grayl purifier and filter: A compact device that can be attached to water bottles to both purify and filter the water
- MSR Miniworks Ex: This is a filtration system that also includes Aquatabs water purification tablets
- Pristine water purification tablets: This is a lightweight option for water purification. If you know you can get clear water free of debris (or if you don’t mind drinking some dirt), these tablets are very convenient and kill 99% of waterborne bacteria and viruses
You can purchase or order these filters at MEC or REI.
Backpacking Clothing List for Hiking Trips
The biggest factor for packing clothing is going to be weather. For simplicity’s sake, this list will be geared specifically towards a milder (15C+) camping trip.
- Breathable, lightweight t-shirt/tank top: Active, synthetic-type shirts work fine, but I personally recommend merino wool. Merino wool is extremely breathable, quick drying, lightweight, and most importantly, it has natural anti-microbial properties which prevent it from getting stinky from sweat. All you have to do is lay it out overnight and by the next morning it will be dry and good as new.
- Breathable hiking pants: The best hiking pants are lightweight, breathable, and have pockets (beware: women’s pants do not always have pockets). Shorts are acceptable too if you’re willing to sacrifice your legs to bugs.
- Undergarments: You definitely want to bring separate undergarments for hiking vs. sleeping.
- Rain gear: Depending on where you are hiking, weather can change very quickly and having a rain jacket can be very useful. In the summer, it might not be the biggest deal, but during colder temperatures, it is important to have proper rain protection. A rain jacket will also protect you from strong winds so on summits/peaks, they are almost always essential. In terms of rain pants, I personally won’t bring rain pants in warmer temperatures simply because rain pants are not breathable and will feel hot and gross. I also don’t mind getting wet from the rain if it’s warm so I would rather not waste space in my pack. Again, in colder temperatures rain pants might be more relevant if the forecast is showing for heavy rain.
- Bandana/Buff: A thin, breathable cloth that can go over your head can be useful for sun protection during hot, sunny days (especially at high altitude). If you are really hot, you can dip the bandana in water and wrap it around your head or neck to help cool you off.
- Hiking shoes/hiking boots :Hiking shoes or boots will provide your ankles with the support to carry the extra weight of your backpack and provide you the traction to hold your ground on uneven terrain
- Hiking socks: Again, I recommend merino wool socks. Merino wool is just the absolute best at wicking away sweat and not to mention, it is a natural and biodegradable product. Too much moisture in the foot is just not a fun time (plus fungal infections). Spending the money on high quality socks is worth every dime. Icebreaker or Smartwool are high quality merino wool brands that have many socks in different lengths and thicknesses to choose from. I bring one pair for hiking and one pair for sleeping.
- Light long sleeve or sweater: This is useful if the temperature is on the colder side during the mornings or evenings at camp. It can also be useful as a form of sun protection if you are prone to burning.
- Base layer top and bottom (sleeping clothes): Unless it’s very hot, I will still bring base layers even during warmer temperatures because temperatures often drop quite a lot at night. I have Icebreaker merino wool base layers and they’re excellent because they are amazing at regulating temperature. They work famously during the cold and even during warmer temperatures, they do not make me overly warm.
If temperatures are colder, I will swap out the hiking t-shirt for a base layer and add layers (fleece, softshell jacket, down jacket) according to how cold it gets. For my sleeping clothes, I will add a toque, mittens, fleece, down jacket, and mountaineering merino wool socks.
Additional Backpacking Gear List & Toiletries:
Toiletry items to bring are:
- Toxic Free Sunscreen
- Hand sanitizer
- Toilet paper
- Toothbrush and toothpaste
- Lip balm
- Biodegradable soap (if you choose to shower – though certainly not necessary)
- Feminine hygiene products (as necessary)
- Medication

Additional backpacking gear that you might choose to bring include:
- Hat
- Wallet
- Sunglasses
- Phone
- Camera
- Book
- Trowel
- Cards
- Repair kit
- Bug spray
- Travel pillow
- Wakeful Travel Journal
Tips for packing Ultralight on a Backcountry Trip
One part of packing “ultralight” means narrowing down on what you need and what you don’t need on your backcountry trip. But a big part of being ultralight actually comes down to money.
The truth is, the lighter and smaller gear is, the more expensive it is. People who don’t have the financial access to these things or are just getting into camping and are not willing to spend the money are not going to have access to “ultralight.”
However, there are some things that you can do to reduce the number of things you carry. On the notes section of the Ultimate Packing List, you can jot down the items that you didn’t really use or need during your hiking trip. Then, next time, you can omit those items from your packing list.
Over time you will develop your own essentials list and know exactly what you really need and what is just extra weight. Another thing you can do is learn how to pack properly. You can watch Youtube videos on this. You won’t reduce weight from packing more efficiently per se, but you will certainly take up less space in your pack. Finally, find items that serve multi-purposes, and try to reduce the things that only serve single purposes. An example I have already mentioned earlier is electrical tape. Instead of bringing both moleskins and a gear repair kit, you can just bring electrical tape and that will address both blisters and any repairs that you may need to do.
Now that you are equipped with everything you could possibly need to know to have a successful backcountry backpacking trip, it is time to move onto the backpacking checklist for overseas travelling.
Backpacking Checklist for World Travellers
Whether you are planning a month-long vacation to Europe, or hopping from island to island in Fiji, the Wakeful Travel Ultimate Packing List has you covered.
Download the Wakeful Travel Ultimate Packing List at the end of this posts if you’re preparing for a big trip.
The Ultimate Packing List has been broken down into the following categories:
- Important Documents
- Electronics
- Toiletries
- Clothing
- Extras
Each category notes all the things that you could possibly need during your trip. Just follow the list as you pack your things, and then use the list as you pack your things to go home. This way, you will not only remember everything you need going to your destination, but you will also be sure not to forget anything while coming home.
Because what’s worse than realizing you forgot your phone at home is realizing that you forgot your phone halfway across the world.
The Wakeful Travel Ultimate Packing List has got your back. Now… get out there and explore.
*This blog article uses affiliate links from Amazon and MEC. We get a small percentage if you use any of our affiliate links. If you're from Canada, we encourage you to use the MEC link above Amazon.


Comments